In this article, we will provide you with a 4 step guide on how to proceed with the GRE?
Many students are unaware of the GRE Registration process; therefore, here is a stepwise guide for the GRE test sign-up.
The GRE test is online as well as a paper-based test. The majority of countries have the computerized test, which is offered throughout the year (except for the public holidays) and all across the world in over 1000 centers.
In order to sign up for the GRE test, the first step is to create an ETS account on its website.
Step 1: Create an ETS New Account
Go to ETS website
Once you get to the ETS GRE Page, you should scroll down and click on the registration button as shown in the diagram below:
After this, another page will open, and then you need to click on the “Register now” button.
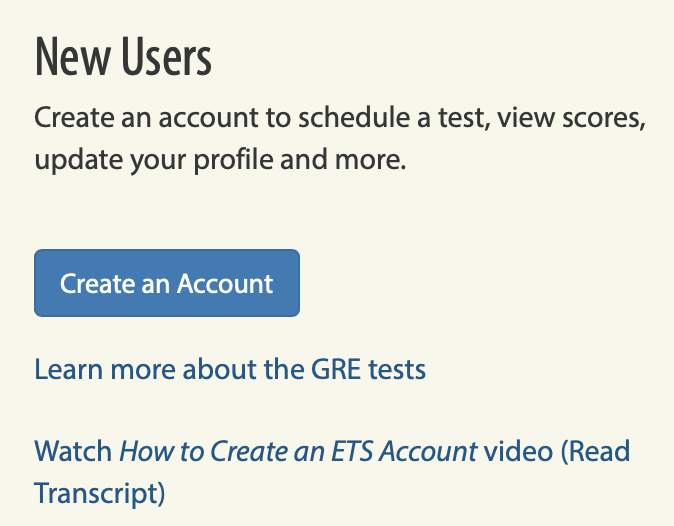
If you are doing the GRE for the first time, then you need to click on the “Create an Account” button under the New Users section.
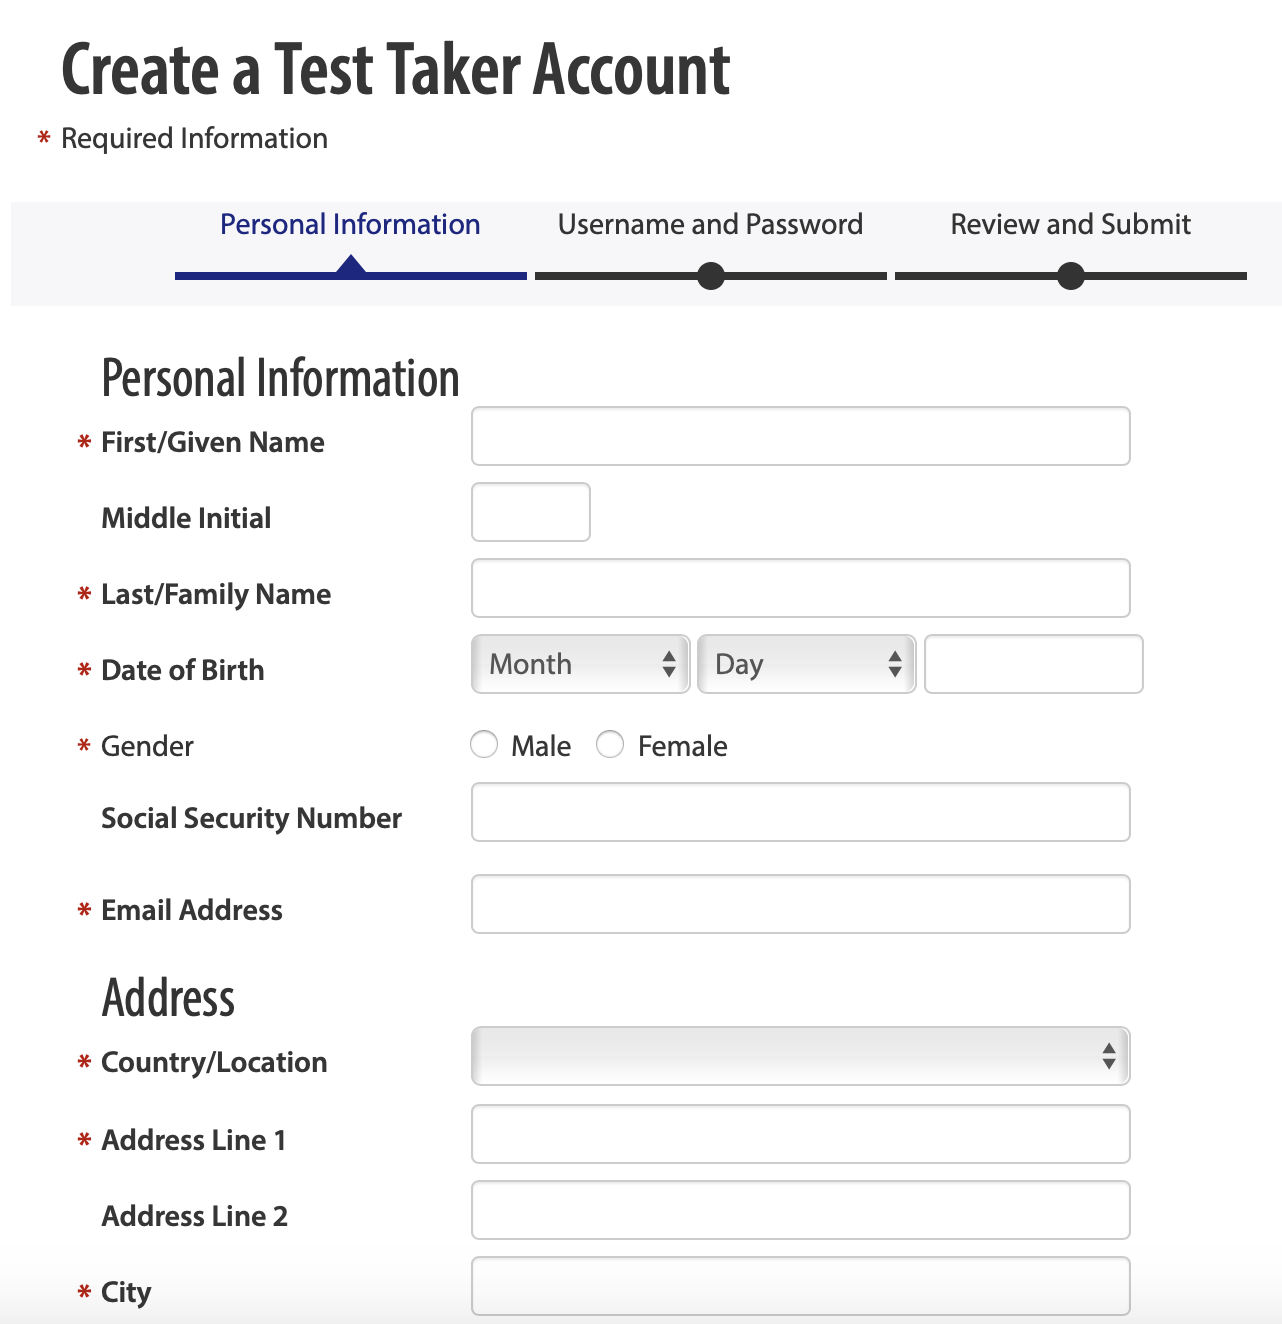
On the following page, you will see the form below, where you need to enter your personal details such as name, date of birth, contact information, country, etc.
Note: You need to be careful before using your name in order to sign-up for the GRE. Make sure the name you entered on the account creation form, should match your Identification (ID).
After you complete all the details in the form, you will get to create a username and password. Then, you need to click on the “Submit” button.
As you submit the form, your ETS account is ready, and the confirmation email will be sent to you with all the account details.
Now, you can begin the process of registering for the GRE test sign-up.
Step 2: Select Test Date and Location
Once you create your new account, then you can go to the “Returning Users” section and enter the username and password.
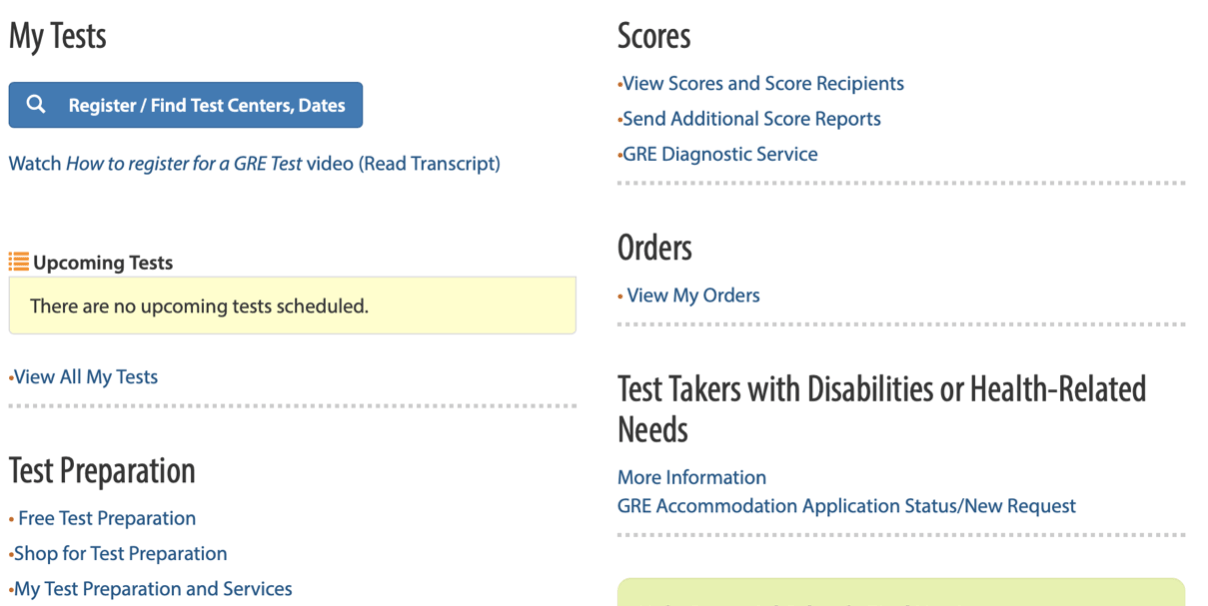
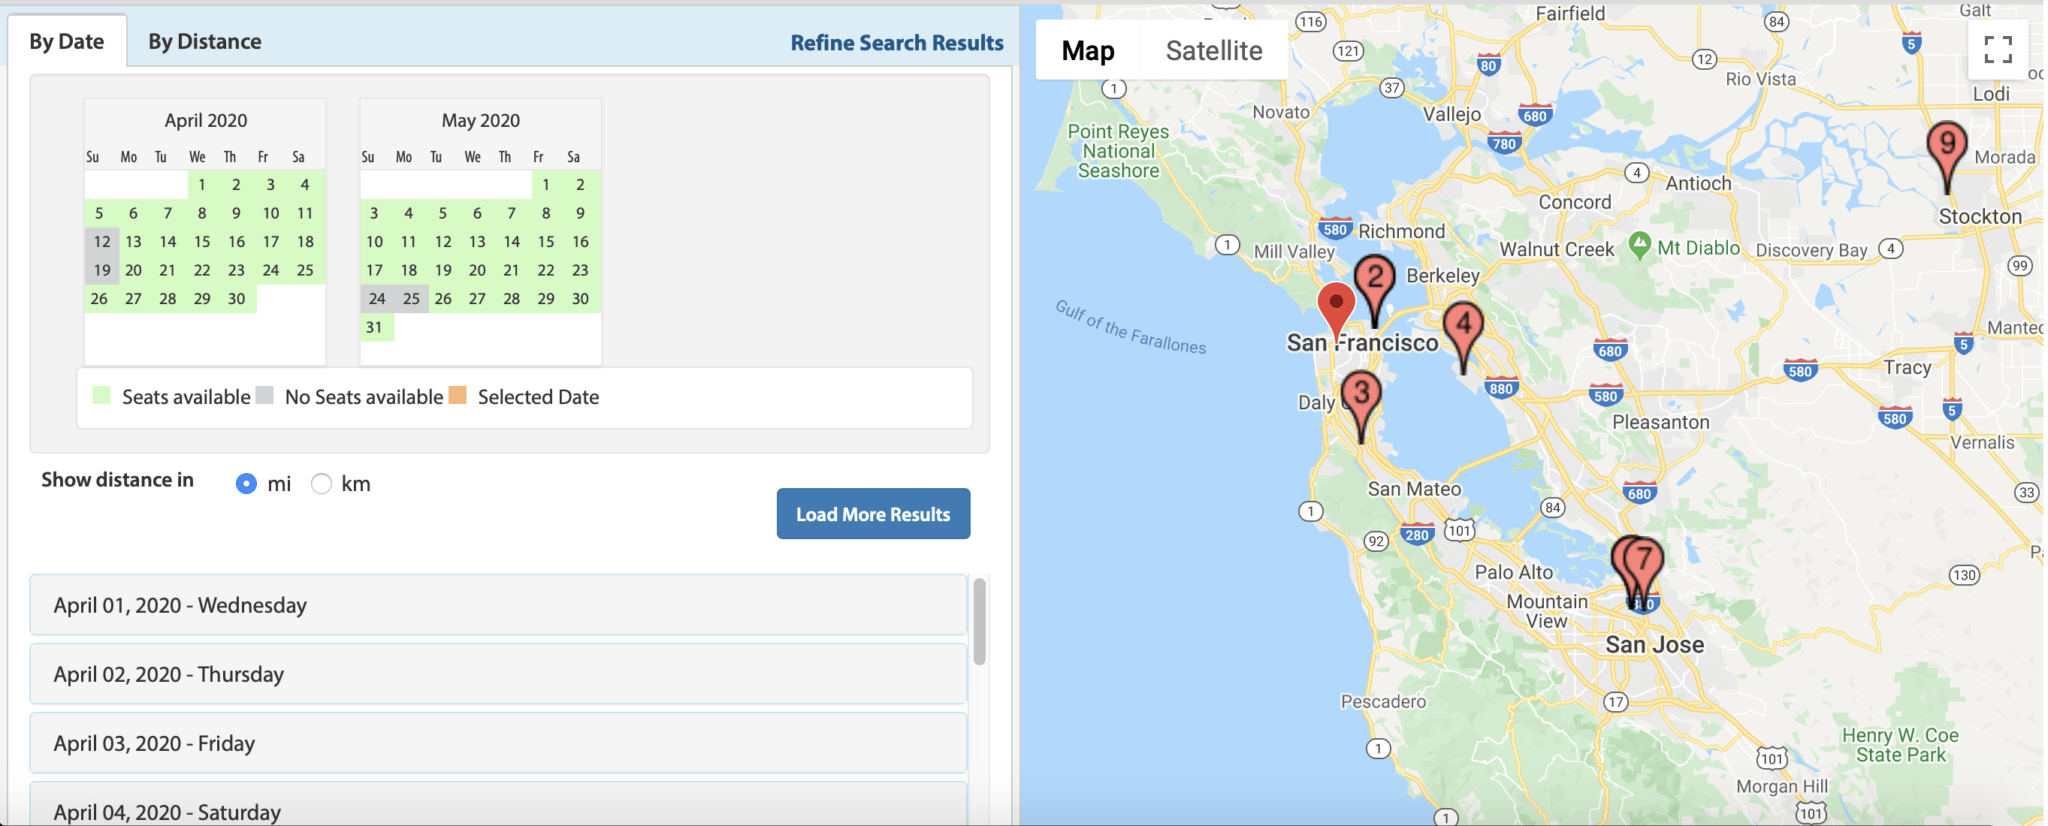
After you sign in, you need to select the test date and location. You will be able to see this option in a calendar format when you click on “Register / Find Test Centers, Dates.”
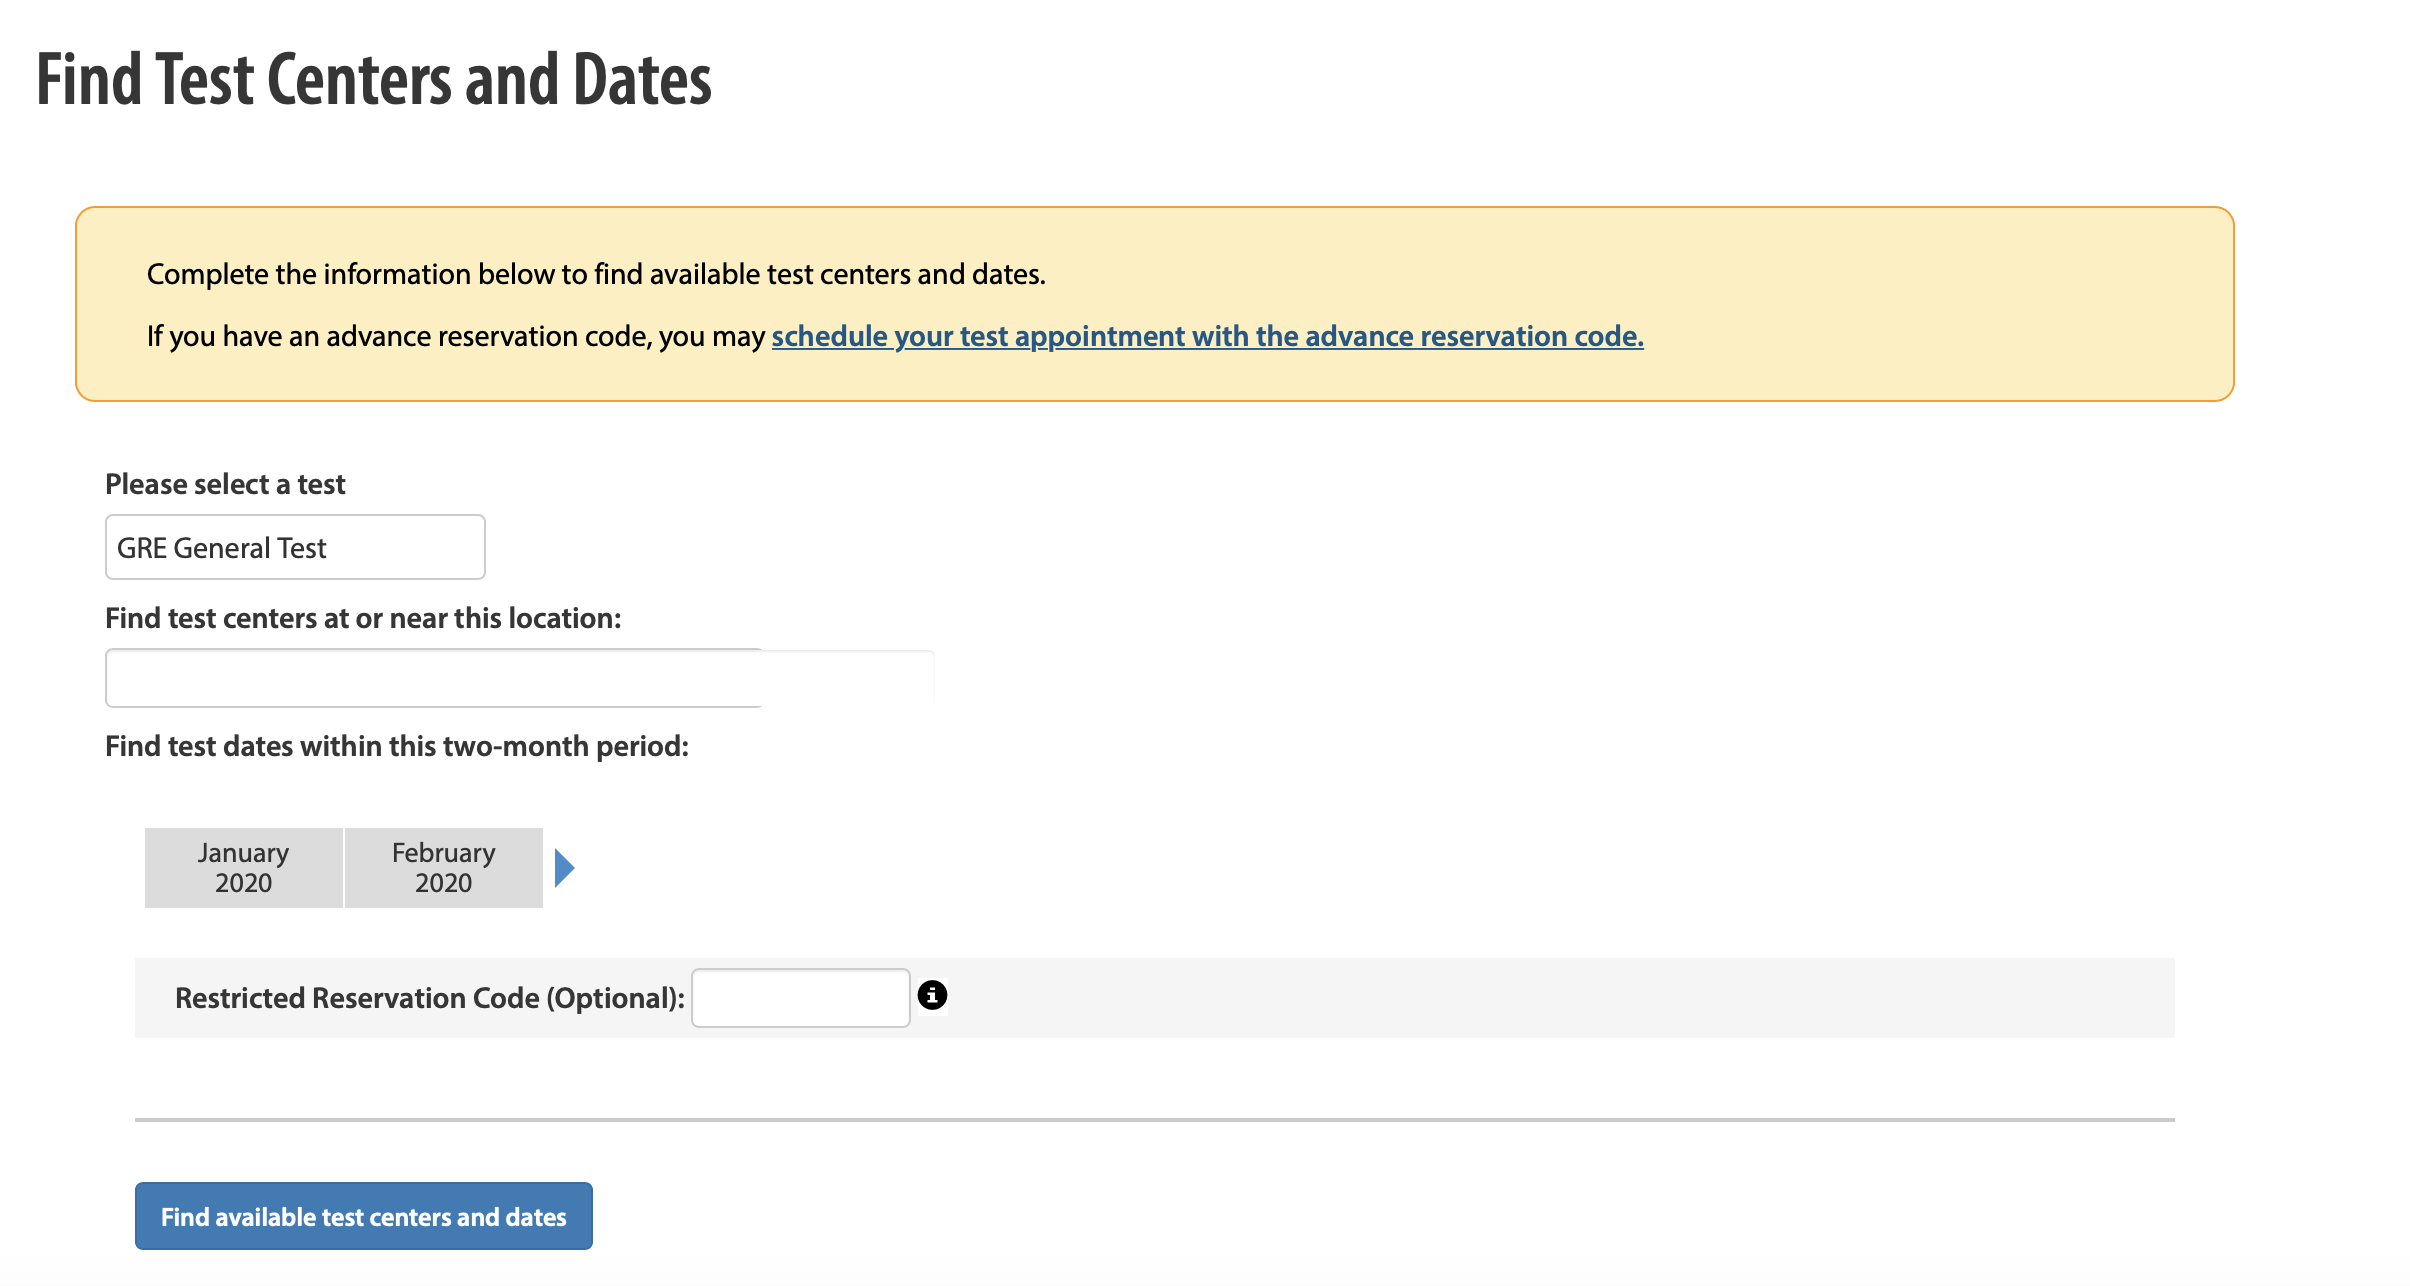
Now, you will need to search for the GRE test Centers and dates. First, you need to select the “GRE General Test” from the drop-down list.
After that, you need to select the test center, which should be close to your location.
After that, you need to select the two month schedule that would display the available dates in the calendar format.
Note: The seats are available on a first-come, first-served basis, so it’s better to sign up for register for the GRE exam in advance.
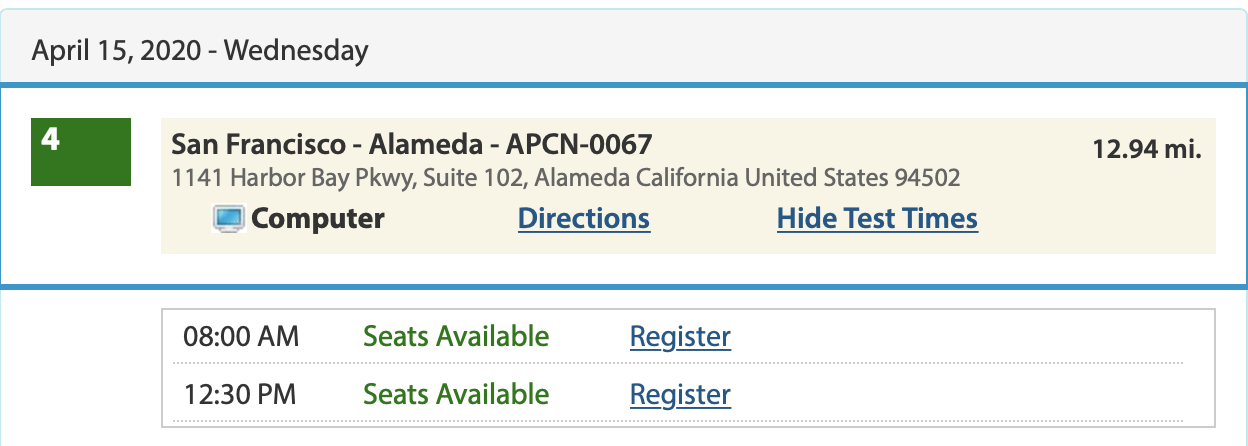
Select the test day and then click on Show available times.
This will show the test timing, and then click on the “Register” button as shown below.
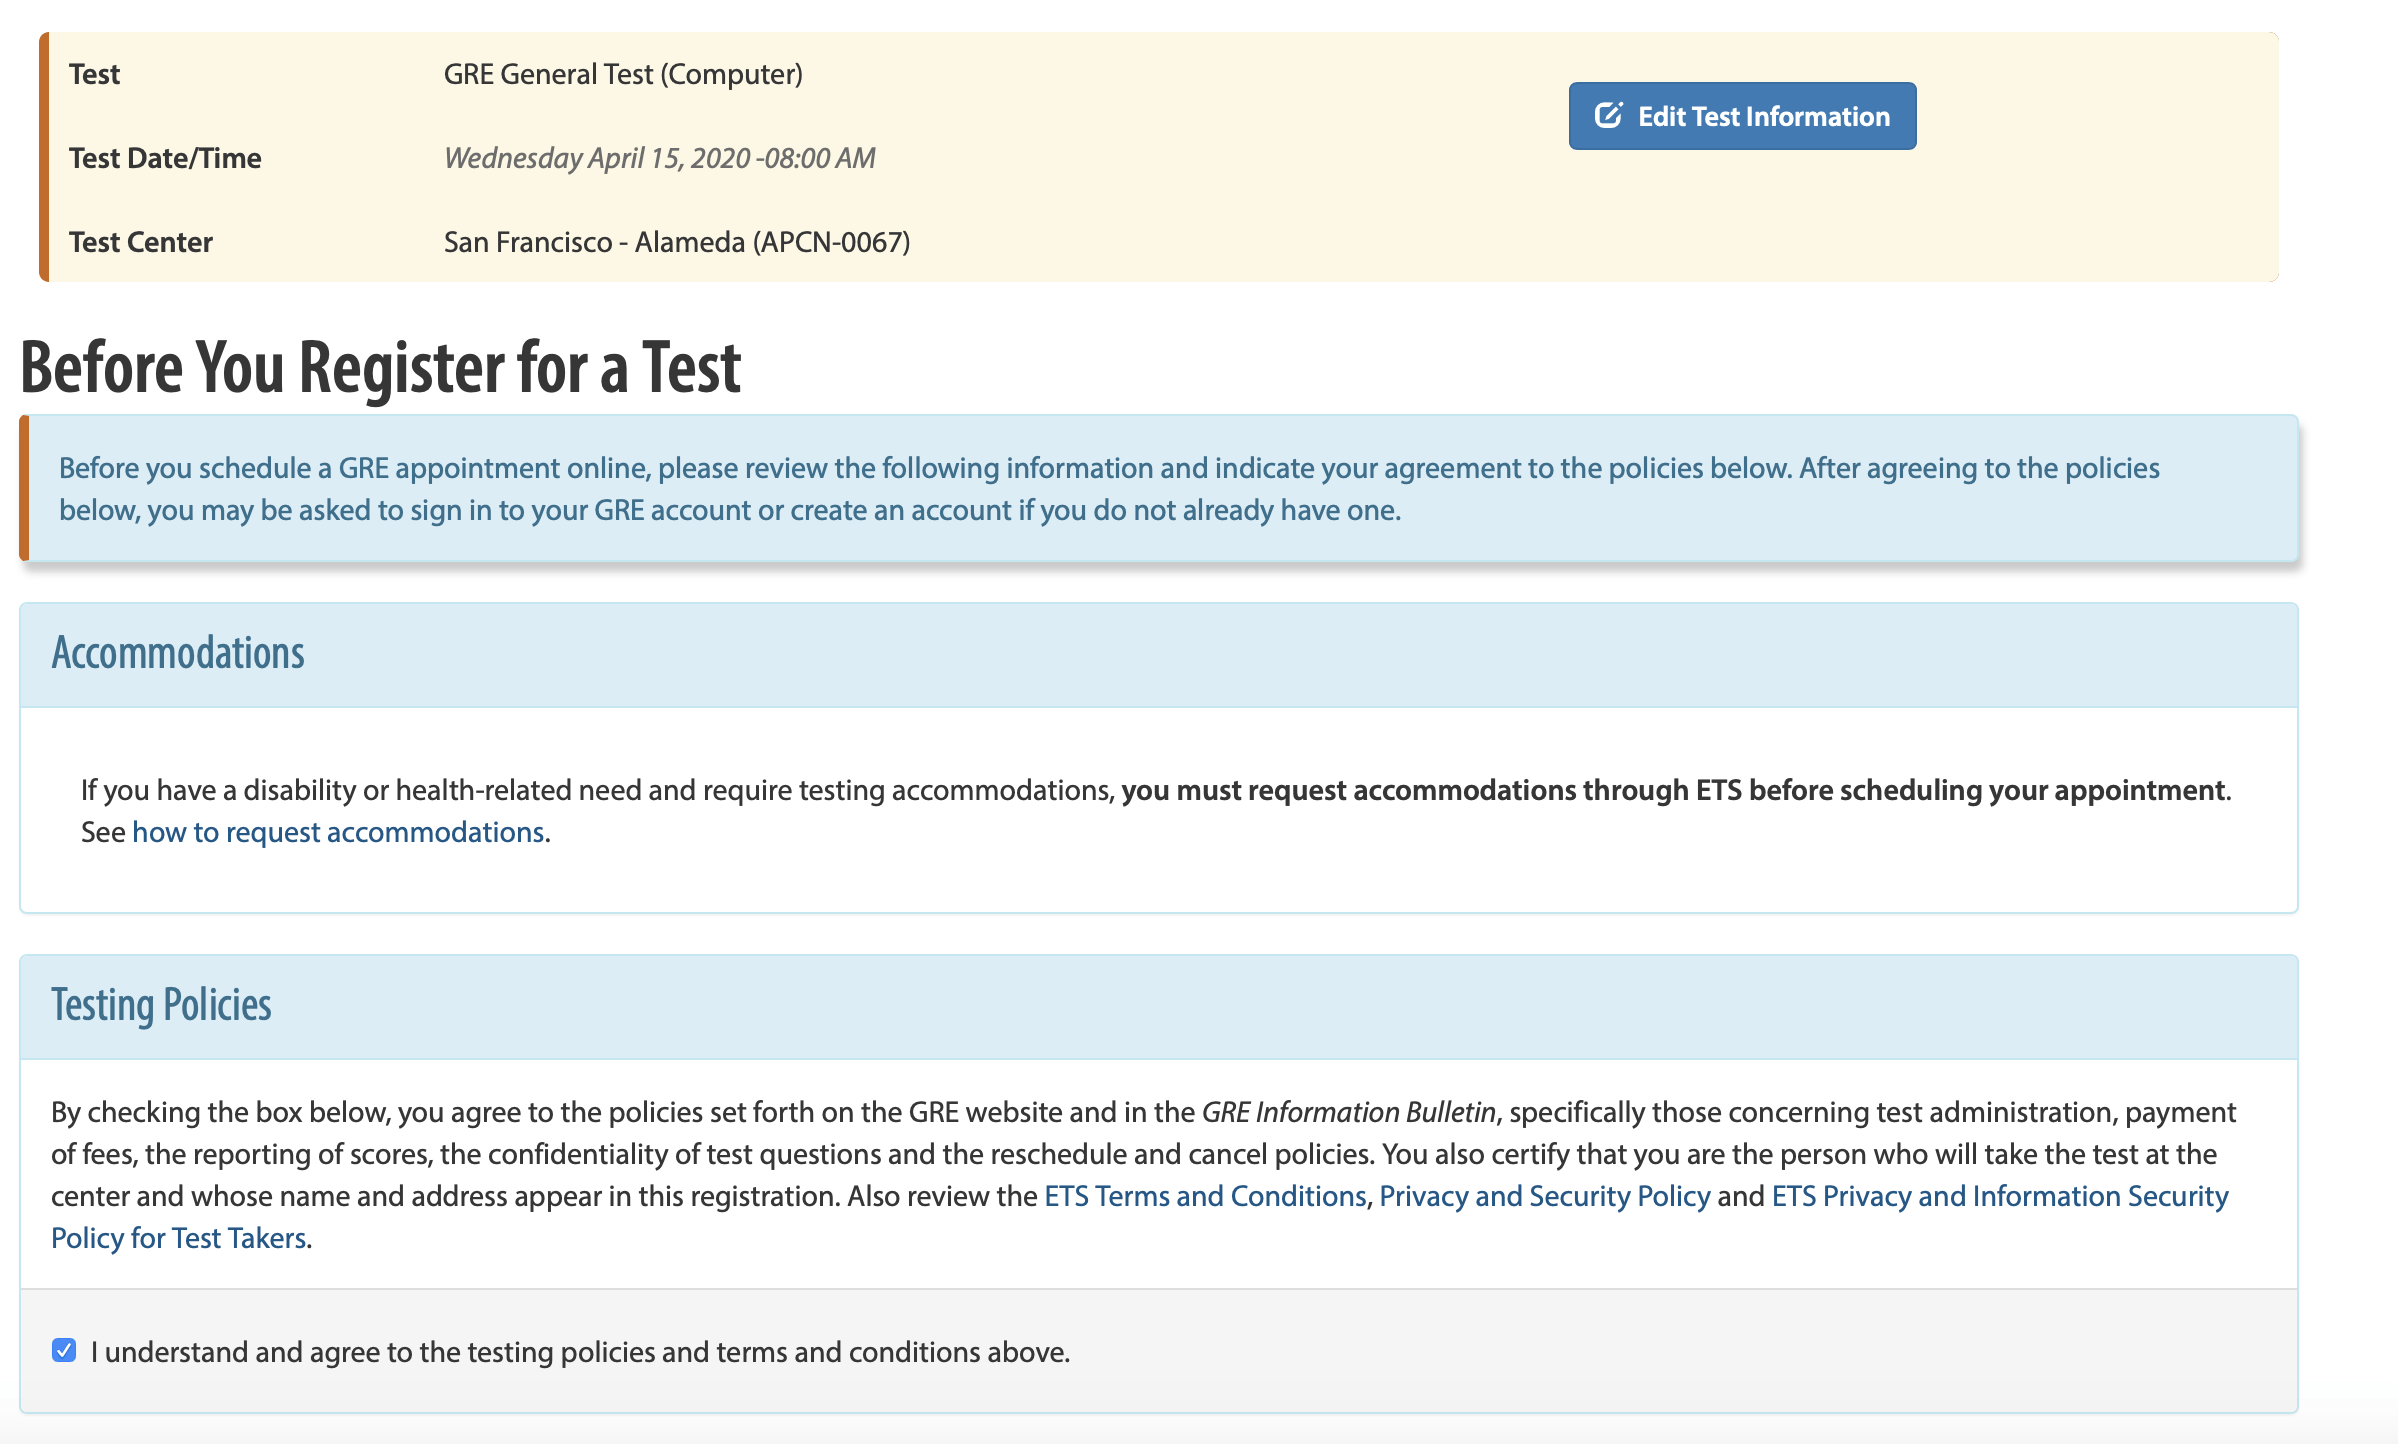
Step 3: Verify your personal details and agree to the Terms
After this, confirm your personal details and agree to the testing policies. You can also opt for free for the GRE Search Services, which would allow universities to send promotional emails.
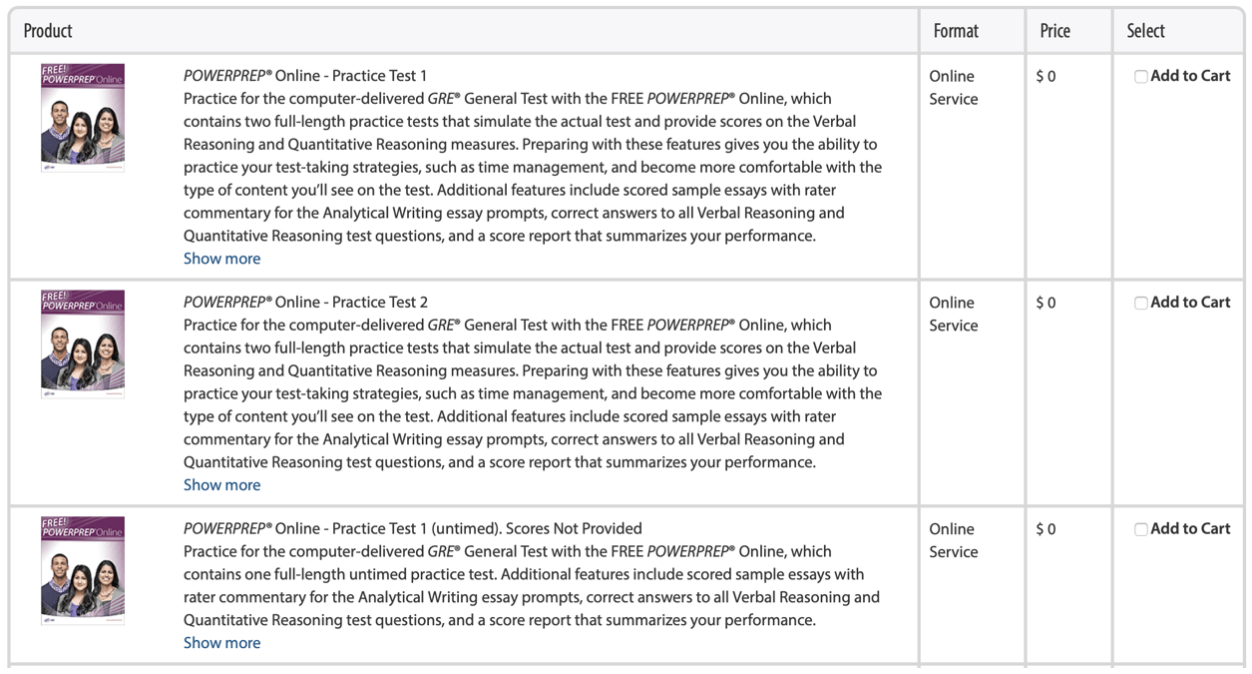
Select the FREE PowerPrep 1 and 2 Full-length practice tests.
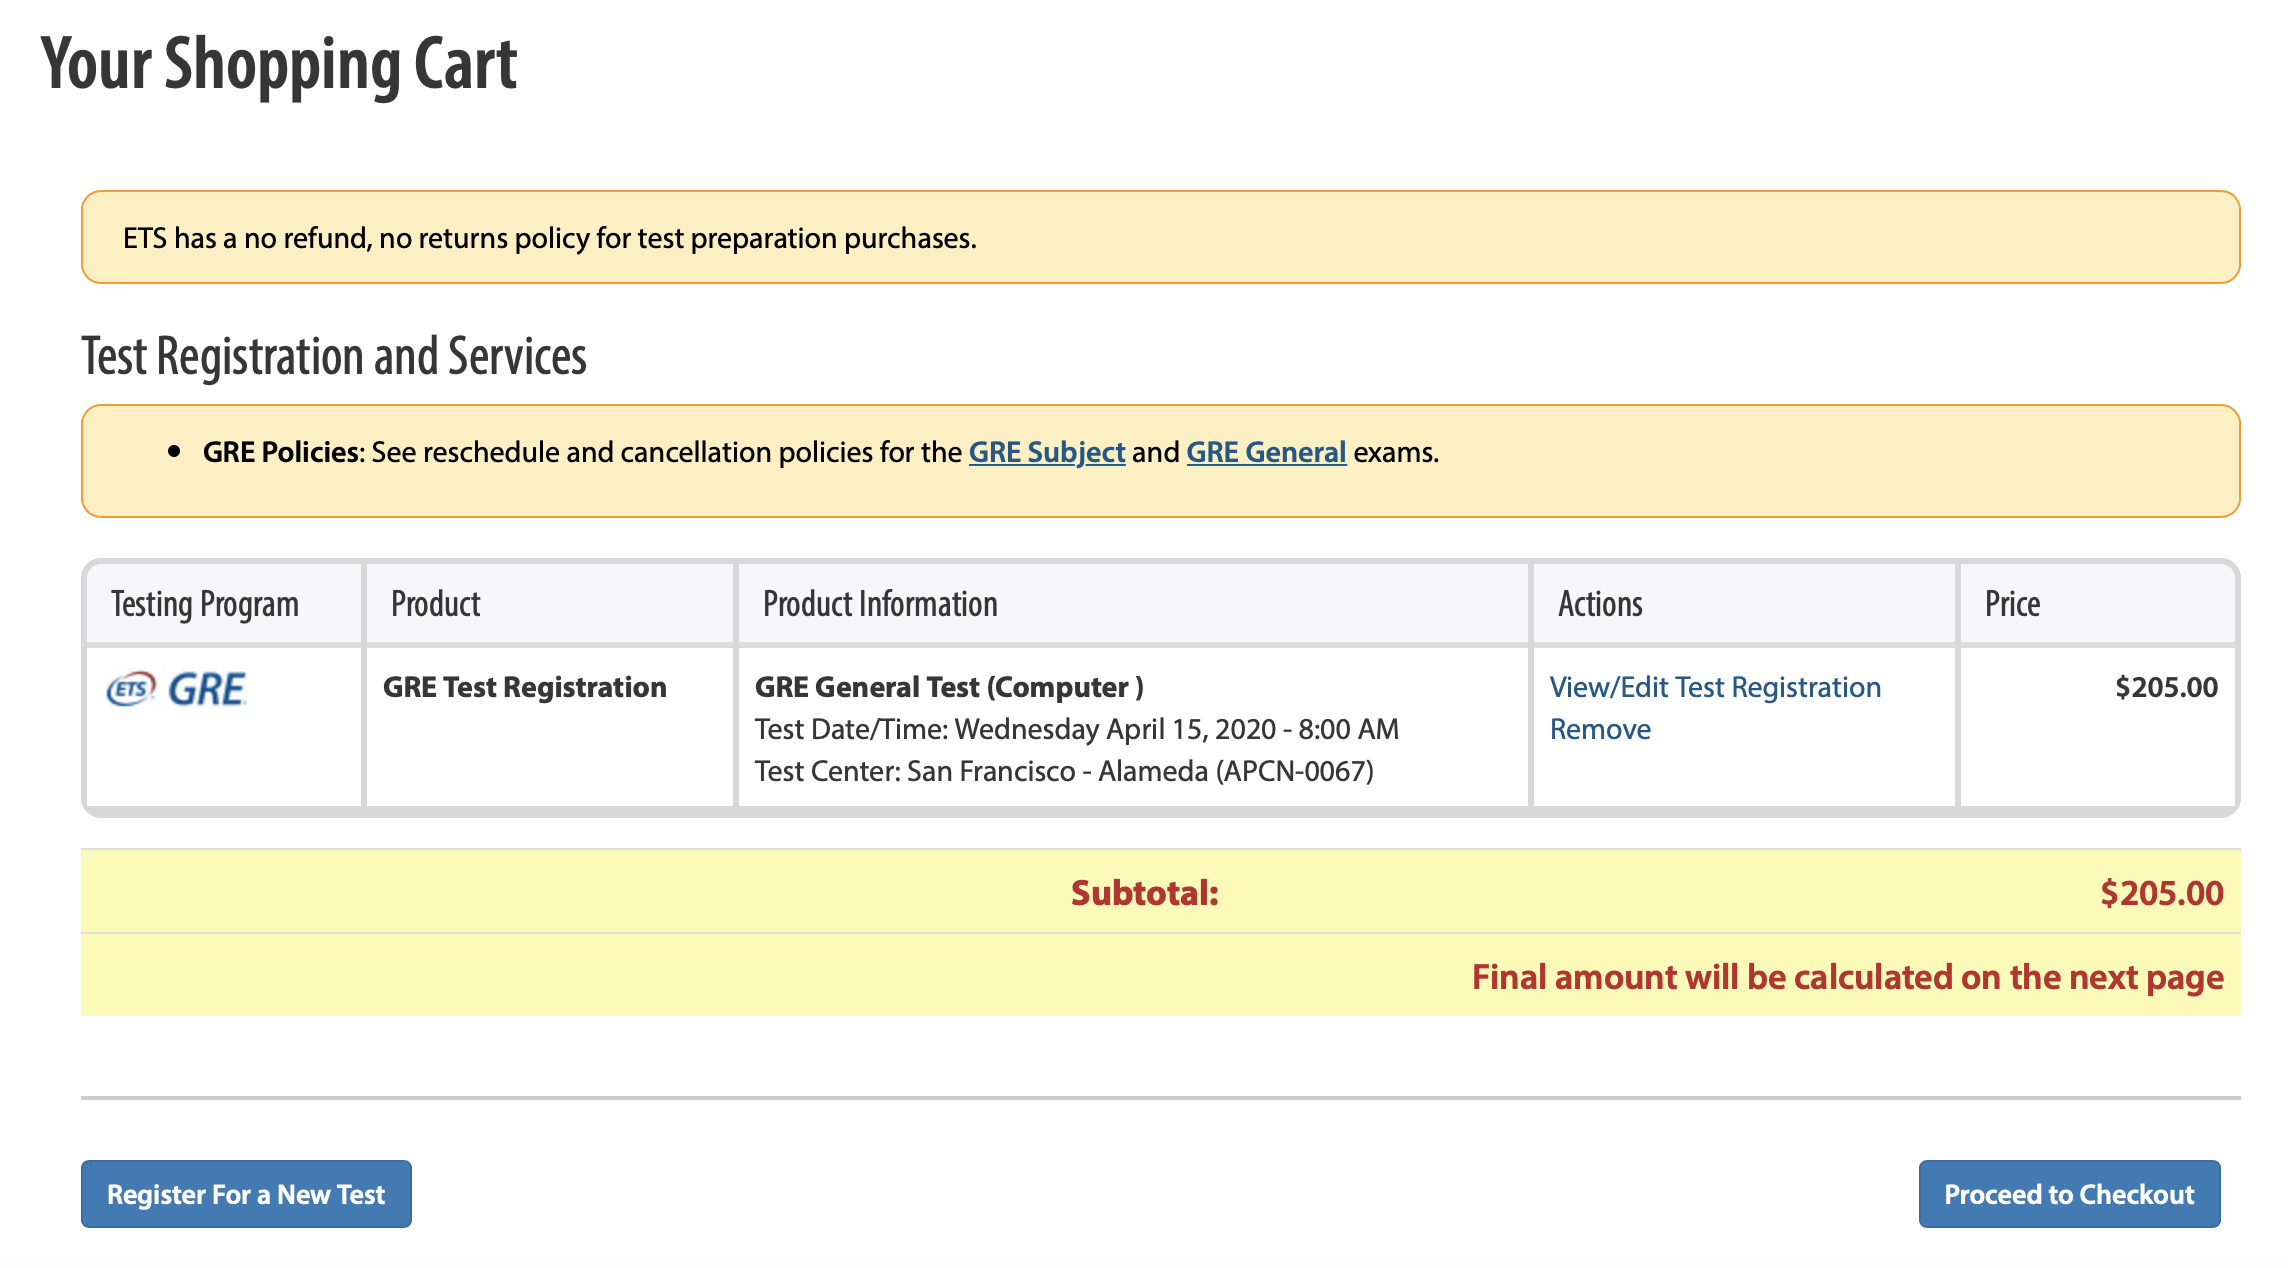
Step 4: Pay the GRE Application Fee
The last step of the GRE registration process is to pay the test fee. It’s time to check out and pay the GRE application fee of $205. You can pay this fee via Credit Card, Debit Card, or PayPal. However, in some countries, an additional payment method of a bank draft can also be used.
If the information is accurate, for the payment of the fee, click on “Proceed to Checkout”.
Make sure that you also familiarize yourself with the GRE cancellation and reschedule policy in case you have some last-minute changes to make.
Generally, the GRE cancellation policy is such that you have to cancel your registration at least four days before your appointment to receive a half refund from ETS. If you cancel it before three or two days, you will not receive a refund.
You are one step closer to Graduate admissions in the USA. As you have already done the GRE exam sign-up, you would need to prepare well for the Real Test, therefore, we would highly recommend you to practice ScholarDen questions.
Next Article: How to Improve Your GRE Score






2 Responses
a very useful guide about GRE registration
Thank you for the kind words 🙂